
SP.GO.E250.MTI
Godox E250 III W/S 3-Pack Studio Flash SoftBox Kit (250 Watt)
Complementary Products
3 Installments with No Interest
Free same-day shipping from stock
24/7 Customer Support
Easy return/exchange
Godox E250 III W/S 3-Pack Studio Flash SoftBox Kit (250 Watt)
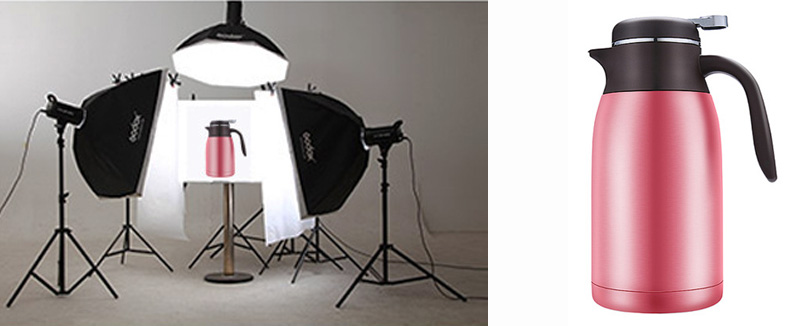
Godox E250 Paraflash 3-Piece Set Overview
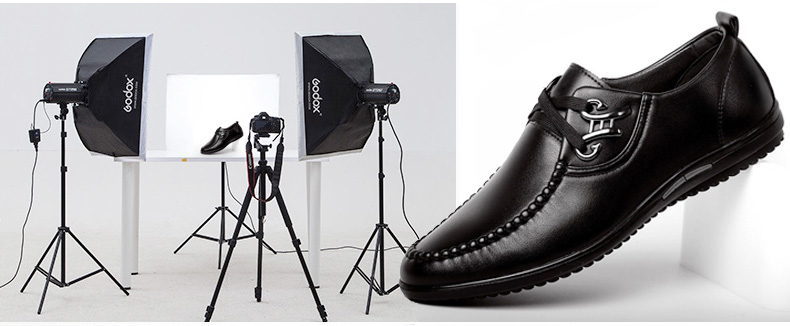
Godox's E250 Flash Head is a 5600K daylight-balanced flash source with solid basic features. The head features flash durations as short as 1/2000 second with a 0.3 to 2.0-second response time. Power is more than 3 stops variable from 1/8th to full power, while the 150W model offers 9 levels of dimming. Settings are shown on the rear digital display. Triggering options include a sync cord, test button, and slave triggering. Wireless control is available with the separate purchase of the FT-16 radio system. The head also features a pre-flash function, making it easy to work with other cameras that use point-and-shoot and pre-flash cameras. At just 2.6 lb, it's easy to assemble a kit with two or more E250s without lugging around a heavy bag. The light features a stand mount with an umbrella channel and operates on 100 to 220 VAC mains power.
Benefits
Precise output displayed on LED panel, 20 steps from 1.0 to 3.0 in 0.1 increments
Use the optional FT-16 trigger to control the flash power ratio, modeling lamp and buzzer, as well as flash triggering
150W modeling lamp adjusts to 9 power levels
Exceptional output stability, no more than 2% drift in the same output
Pre-flash suppression function enables synchronization with cameras with single pre-flash firing system
Automatic memory and recovery of adjusted panel settings

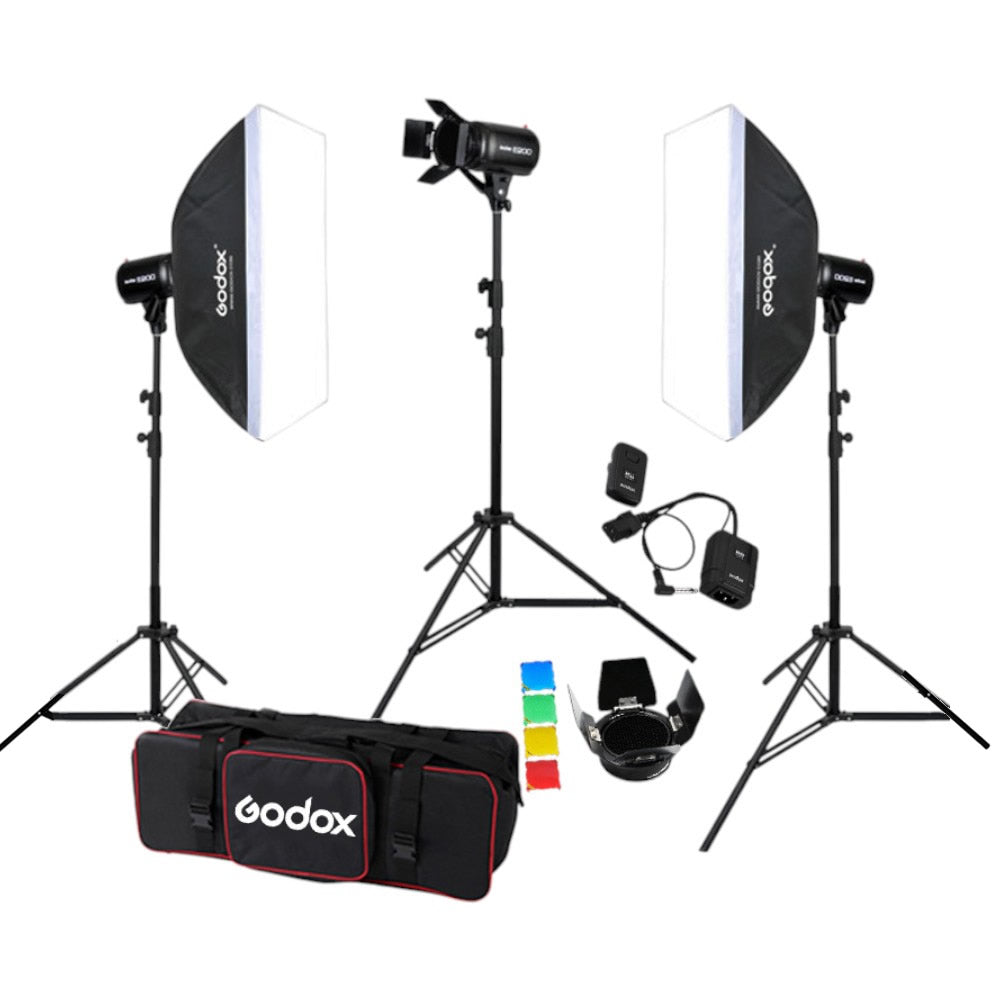
SET CONTENTS
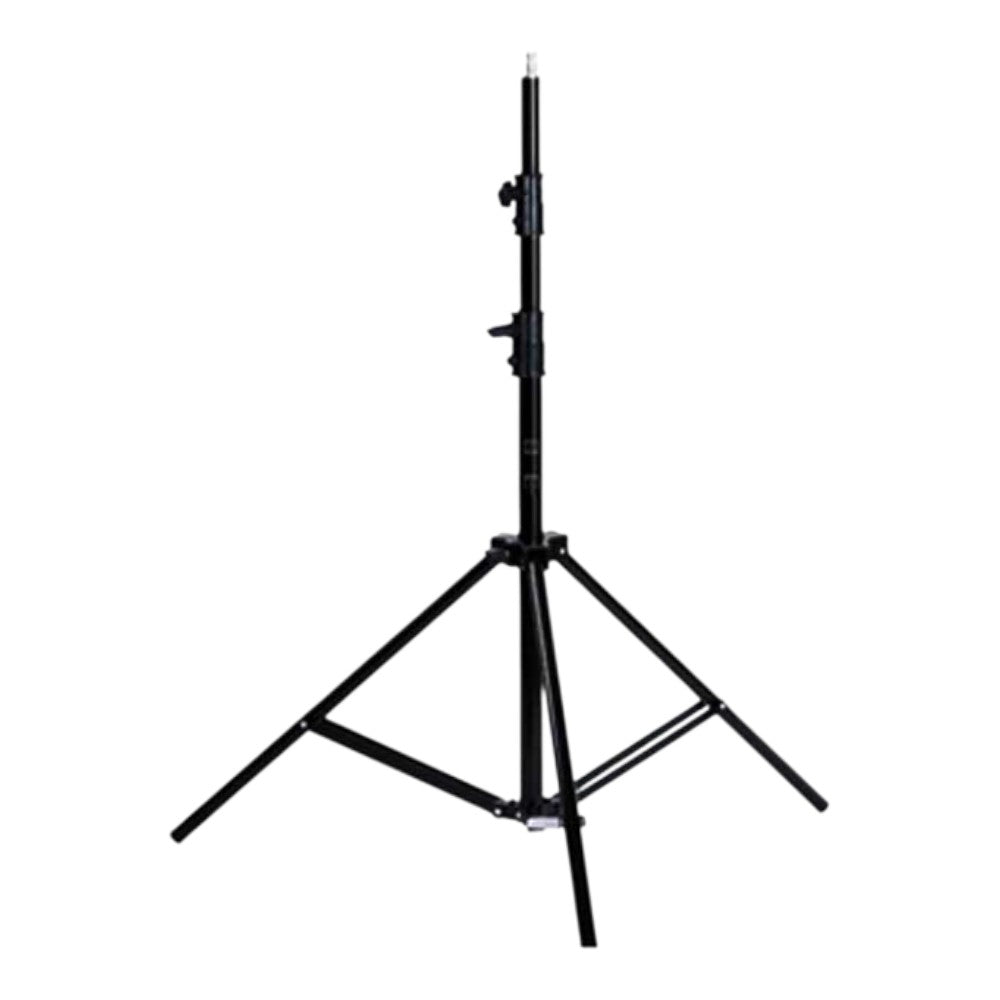
3 Carrying Legs
2 50x70 Softboxes
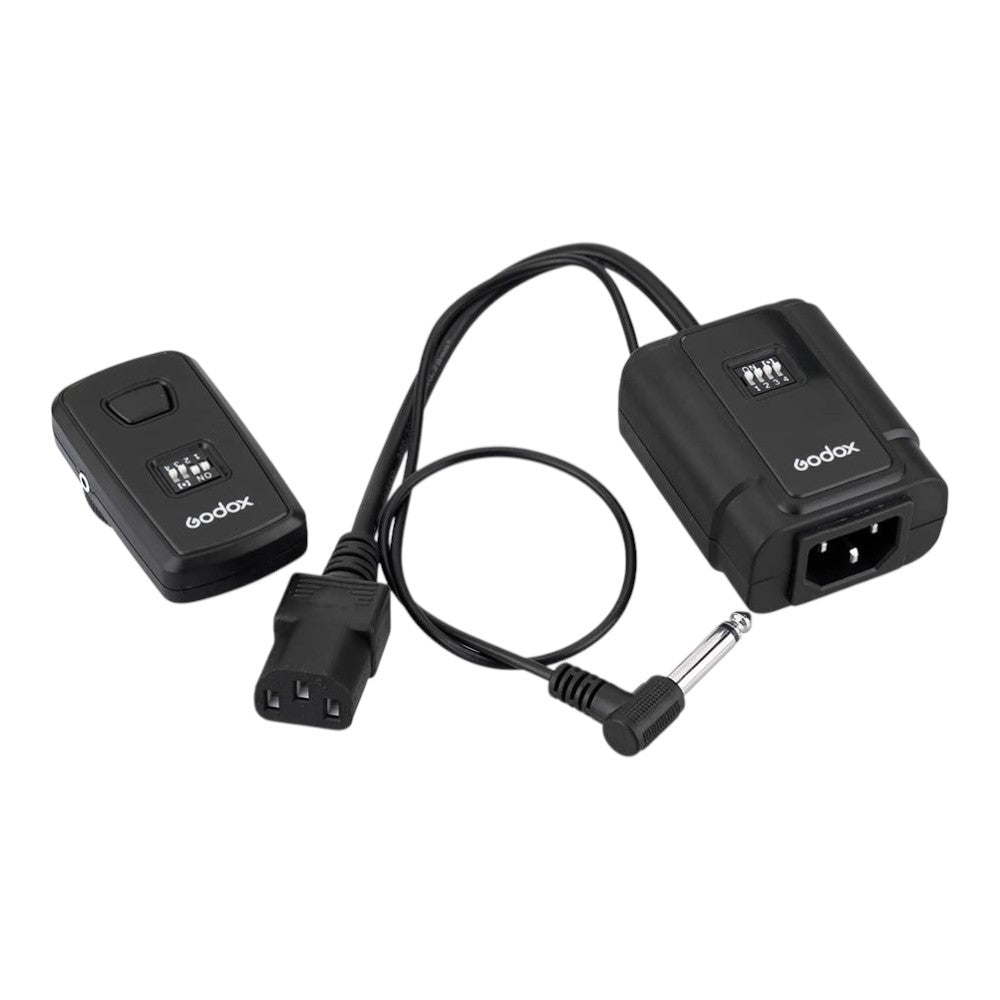
1 Trigger
1 Honeycomb Set
1 Carrying Bag
3 Godox E250 Flash Heads
TECHNICAL REVIEW
Carrying Leg: Features a telescopic system, with a maximum length of 200 cm and a minimum length of 81 cm. There are two adjustable bridge connections for adjusting the leg length. When fully assembled, the length is reduced to 80 cm. The 23.5 mm thick legs will safely support the Godox E250 Paraflaşları. Weighing 1040 g , they provide great portability and can carry up to 2.5 kg .
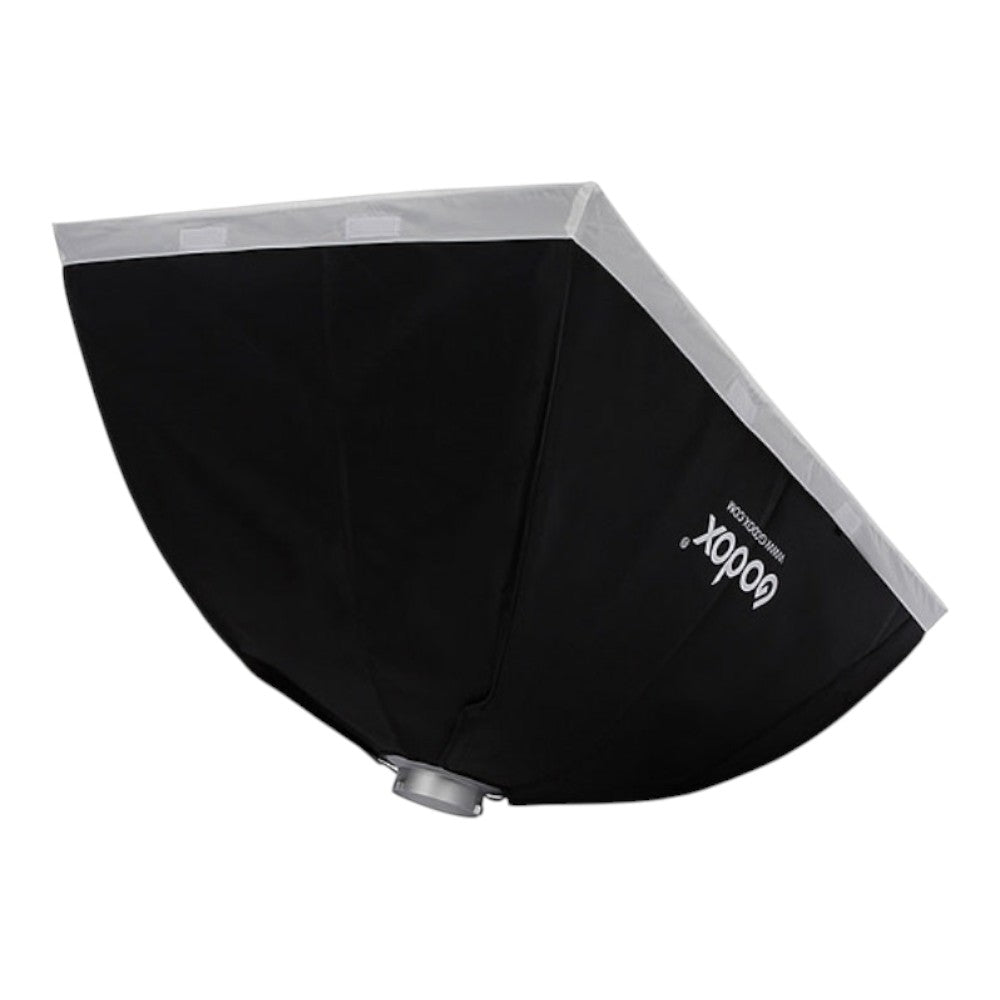
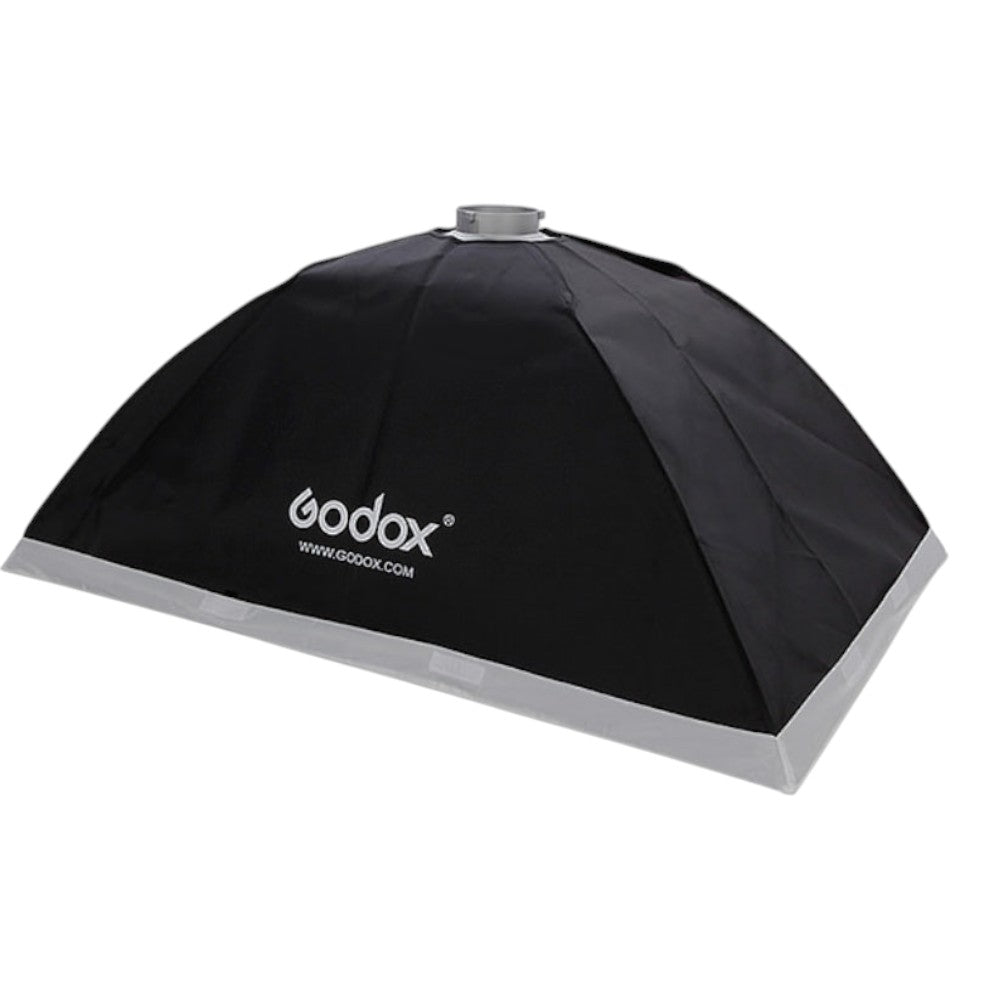
Softbox: Softboxes measuring 50 cm wide, 70 cm high, and 40 cm deep will soften the texture of the light produced by the Godox E250 Paraflash Set. You can also further enhance the quality of the softened light by attaching cloths to the inside and outside of the softboxes. Adhesive labels are available to help secure the cloths to the softboxes, making installation and use of the softbox more enjoyable.
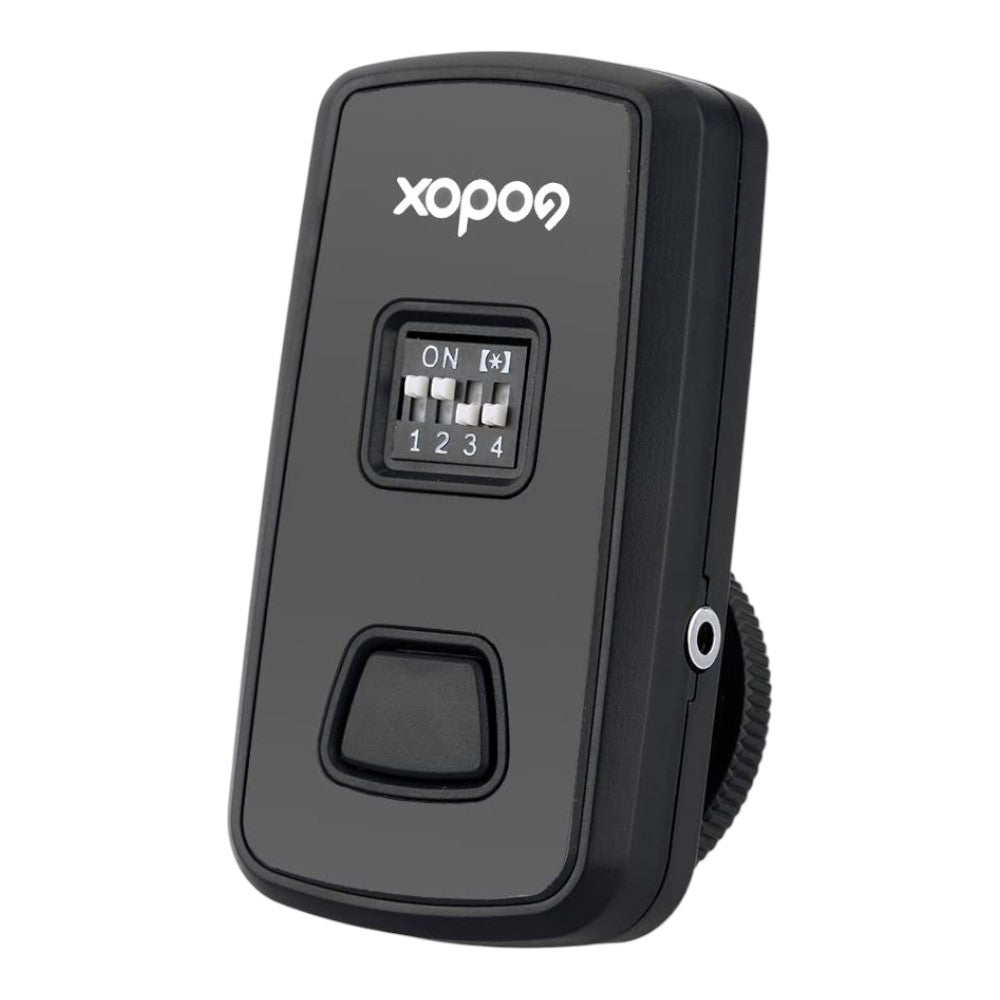
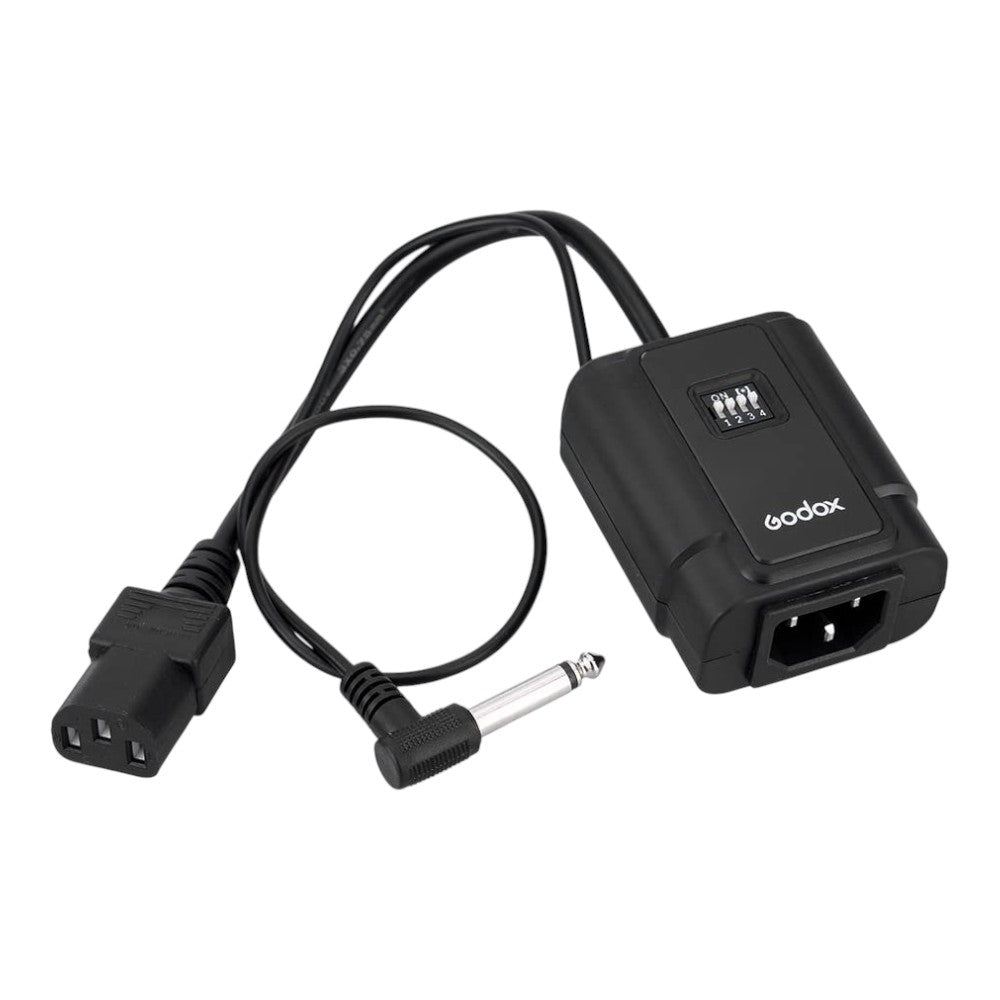
Trigger: The trigger consists of two parts. One part attaches to the back of the Godox E250 Paraflash and the other to the top of the camera. When the camera's shutter is pressed, you can see that all the Godox E250 Paraflashes fire simultaneously with a single trigger.
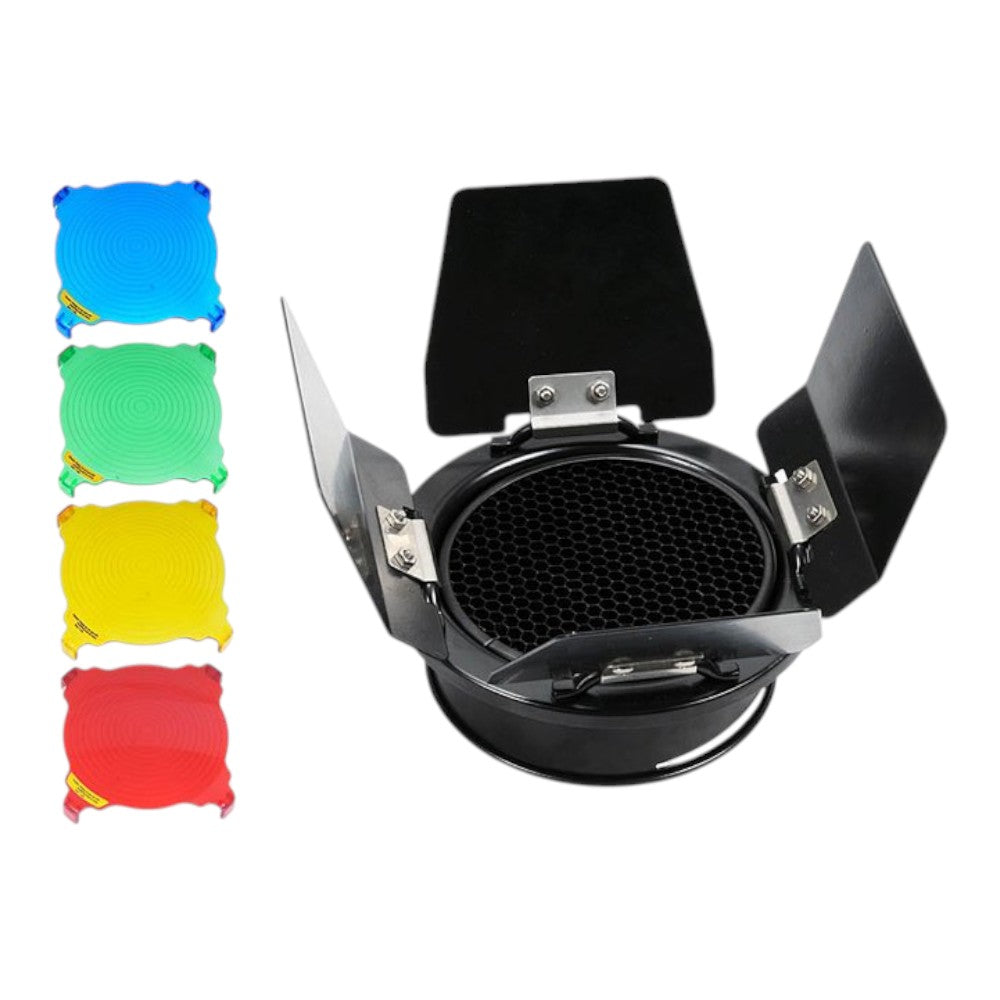
Honeycomb Kit: The Godox E250 Paraflash Kit features a honeycomb design that allows you to focus the light from your paraflash on a single point or distribute it more controlledly over a wider area. You can also add color to the Godox E250 Paraflash light using the four filters included in the kit (Yellow, Green, Red, Blue) .
Carrying Bag: It is black in color, has a shoulder strap, and allows you to carry your set easily, and has quality stitching and an ergonomic structure.
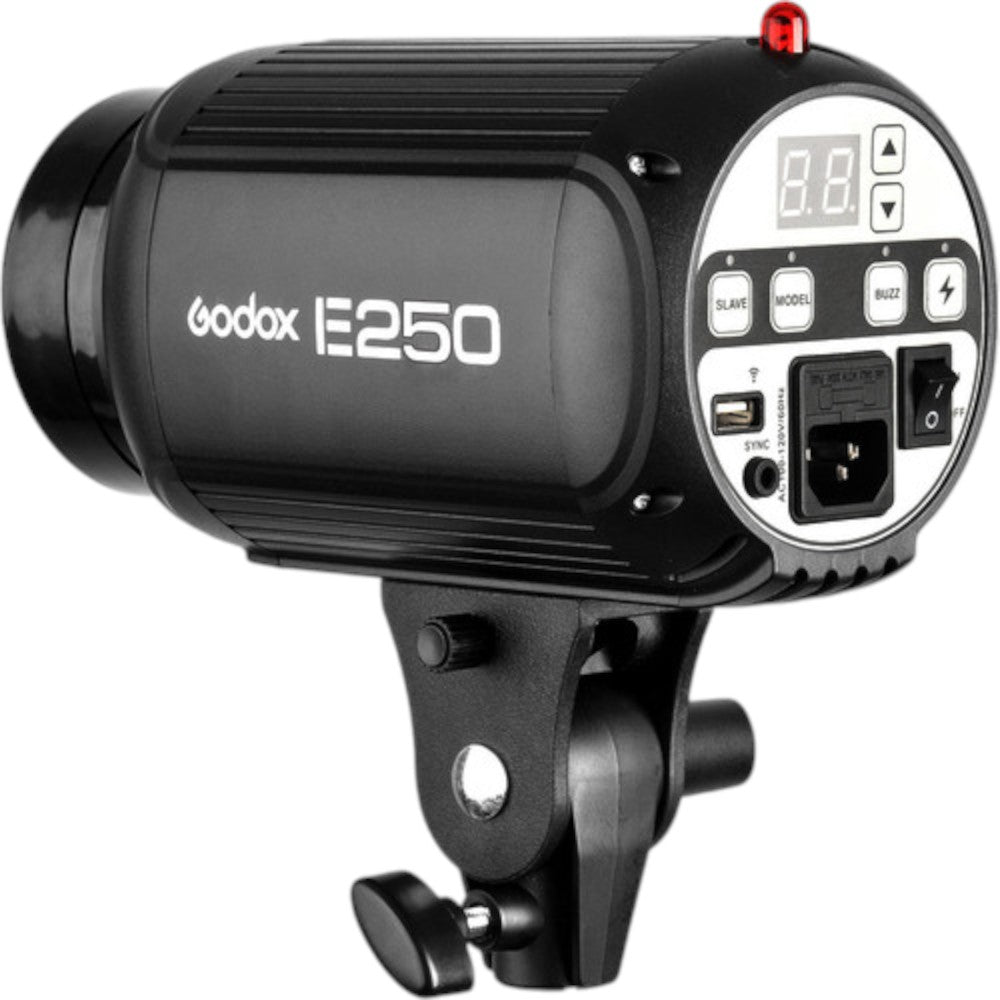
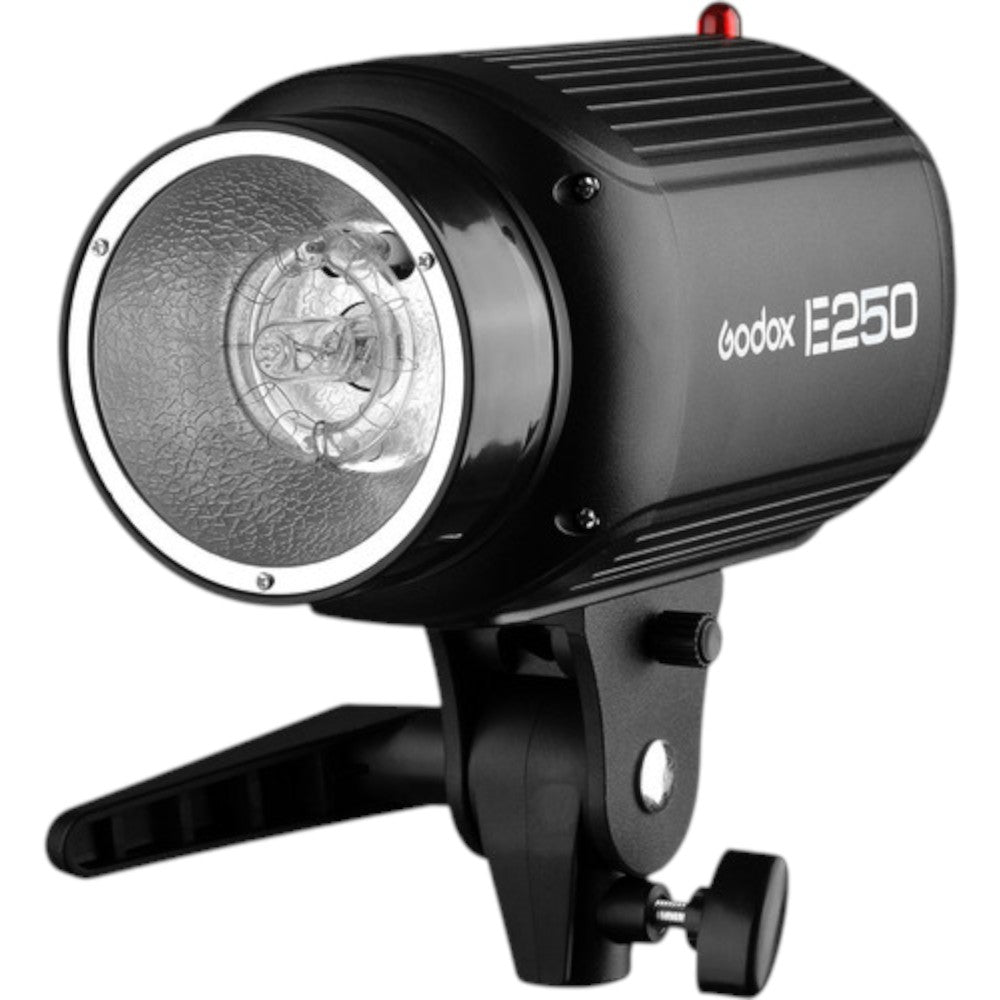
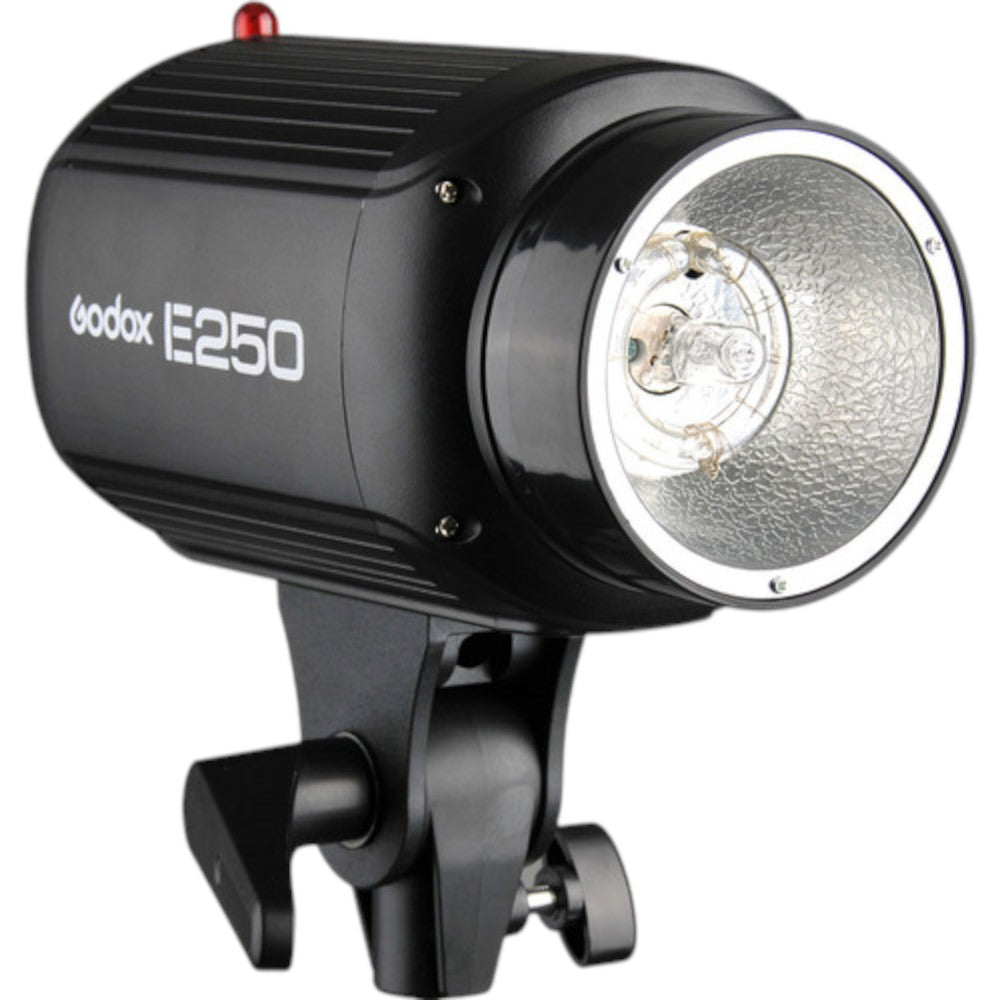
Godox E250 Paraflash Head:
Let's take a closer look at the features of the E250 Paraflash, which is the main element of the Godox E250 Paraflash Set.
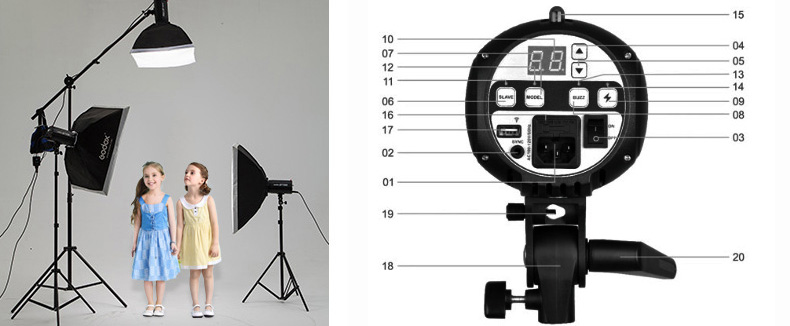
01 - AC Power Socket: The power cable of the product is plugged into the AC Power Socket and the energy required for the flash to operate is provided.
02 - Sync Cord Jack: This is where the trigger device is plugged in. This device triggers the Godox E250 Paraflash when the camera's shutter button is pressed.
03 - Power Switch: Turns the power of our product on and off.
04 - Up Button: Allows us to increase the light power (Max 3.0) of the Godox E250 Paraflash.
05 - Down Button: Allows us to reduce the light power of the Godox E250 Paraflash (Min 1.0).
06 - Slave Model Button: The Godox E250 Paraflash set includes three paraflashes. If you want to use two or three of these paraflashes simultaneously, the LED on the Slave Model Button on all paraflashes must be blue. To turn the LED blue, press the Slave Model Button for approximately two seconds. This activates the red LEDs on the paraflashes, ensuring communication between all paraflashes. Otherwise, only the paraflash to which the trigger is connected will work, while the other paraflashes will not.
07 - Modeling Lamp Output: This will create a shadow effect around your subject when shooting with a paraflash. Holding this button for approximately 2 seconds will turn the LED above the button blue, activating the paraflash's shadow-casting feature. To turn this feature off, simply hold the button for approximately 2 seconds.
08 - BUZZ Button: After the initial flash, there is a waiting period of approximately 1 to 2 seconds for the flash to prepare for a new one. To ensure an audible signal that this period has elapsed, press and hold the BUZZ button for approximately 3 seconds, ensuring the LED above the button turns blue. To turn off the audible warning system, press and hold the BUZZ button for approximately 2 seconds, ensuring the LED above the button turns off.
09 - Test Button: Used to locally test the flashlight. You can test the product's durability by pressing and holding the Test Button for approximately 2 seconds.
10 - Digital Display: Allows you to monitor the light power value of the product digitally between min. 1.0 and max. 3.0 values.
11 - Digital Display: Panel that displays the light power value of the product digitally.
12, 13, 14 - Slave, Model, BUZZ Indicator: These LEDs indicate whether the relevant feature is enabled or disabled when the Slave Model Button, Modeling Lamp Output, and BUZZ Buttons are held down for approximately 2 seconds. When the LEDs turn blue, the relevant feature is active; when the LEDs turn off, the relevant feature is inactive.
15 - Light Sensor: This sensor allows the flashes to communicate with each other. You can activate or deactivate this feature with the Slave Button, as described above.
16 - Fuse: It is a fuse added to protect the product from high voltages.
17 - Wireless Control Port: This is the section added to the USB model of the trigger apparatus used to trigger the flash.
18 - Mounting Bracket: This is the section that will allow you to place the paraflash on the carrying feet.
19 - Umbrella Input: When you want to attach an umbrella to the paraflash, it will help to fix the attached umbrella.
20 - Direction Adjusting: It is the device that gives the paraflash the ability to move up and down.
SAMPLE PHOTOS


Godox E250 III W/S 3-Pack Studio Flash SoftBox Kit (250 Watt)
-
Shipping
Free same-day shipping from stock
-
24/7 Customer Support
If you have any questions, you can always contact us. You can get LIVE or AI support through the 'GET ADVICE' app. We respond within minutes during business hours.
-
Contact us
Hocapaşa District Muradiye Street Hayyam Bazaar No: 17-19 Floor: 3/306 Sirkeci Fatih Istanbul